Convert a Pop-Up Canopy Shelter to Hot Tent with Wood Stove Inside
How to Convert a Pop-Up Canopy Tent into a Hot Tent with Stove Jack
A pop-up canopy tent is a convenient shelter for outdoor campsites, but with some thoughtful modifications, you can transform it into a functional hot tent equipped with a tent wood stove. This conversion opens up new possibilities for overlanding camp, extended hunting trips, and cold-weather adventures where reliable heat under shelter becomes essential.

Why Convert a Pop-Up Canopy?
Pop-up canopies are lightweight, affordable, and easy to set up—qualities that make them appealing for backcountry use. By adding a stove jack, you gain the ability to safely operate a wood stove inside your shelter, dramatically improving comfort wet weather or freezing temperatures. The result is a hybrid tent that combines a portable shelter with the warmth of a campfire.
Tent Wood Stove as a Campfire Alternative During Burn Restrictions
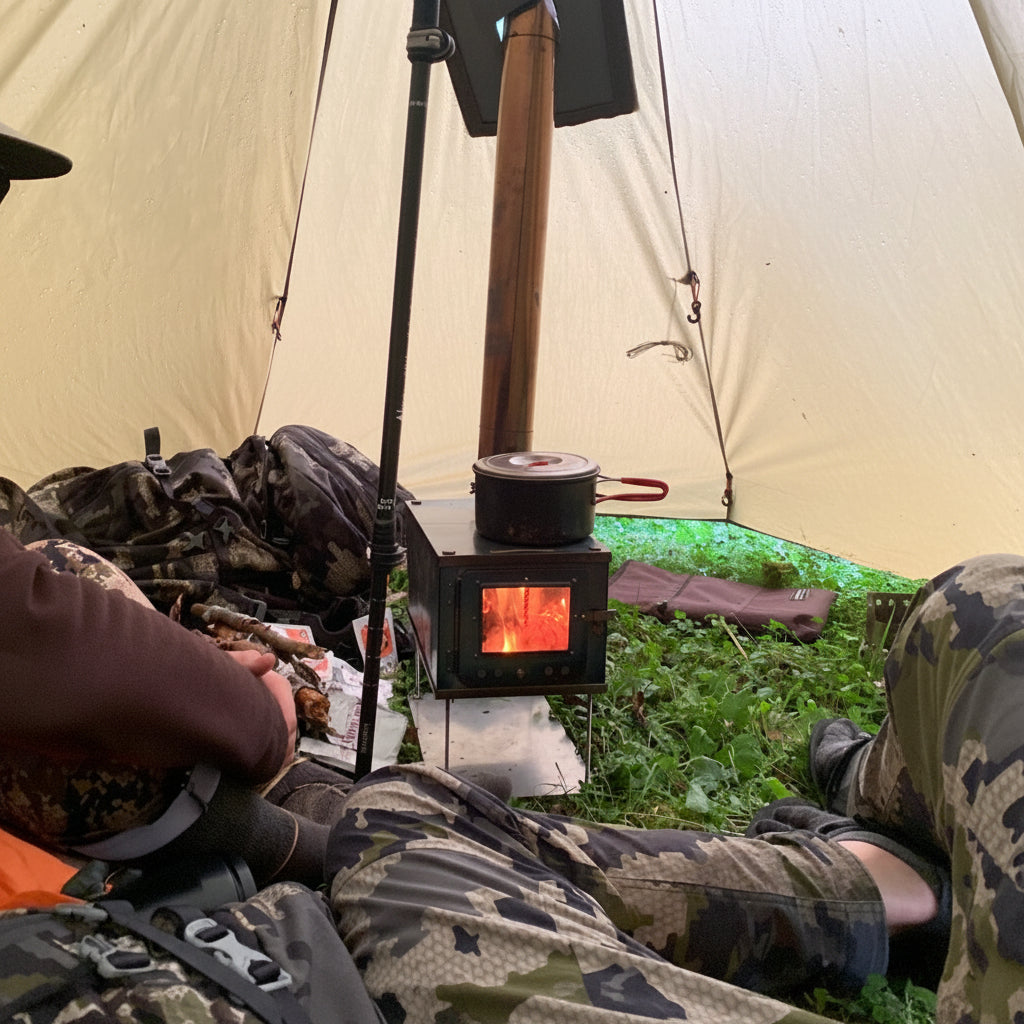
One of the most practical advantages of converting your pop-up canopy into a hot tent with a wood stove is the ability to have a reliable heat and cooking source even when campfire restrictions are in effect (check with local land managers). Many regions enforce seasonal or year-round burn restrictions due to fire danger, air quality concerns, or local regulations. A wood stove installed inside your shelter provides safe alternative that keeps you warm and allows you to cook meals without violating these possible restrictions.
Unlike an open campfire, a properly installed stove jack system contains the fire completely within your shelter. The stove pipe vents smoke safely through the roof (use spark arrestor), and all flames remain enclosed—lowing the risk of sparks escaping into dry vegetation. This makes a hot tent setup an excellent choice for camping during high-fire-danger seasons or in areas where open flames are prohibited.
Wood Fire Heat and Cooking Under Shelter
Beyond regulatory burn compliance, a sheltered stove offers practical benefits over traditional campfires. You can cook, boil water, and heat your shelter simultaneously without exposure to wind, rain, or snow. The stove's efficiency means you use less fuel to achieve the same warmth and cooking capability. For extended trips in remote areas or during off grid camping adventures, this combination of heat and cooking capacity under shelter transforms your camping experience and extends your season into months when open fires would be impossible or dangerous.
What You'll Need
Before starting your conversion, gather the following materials:
- A pop-up canopy tent (typically 10x10 or larger)
- A stove jack kit or stove pipe collar designed for tent use
- High-temperature silicone sealant or fire-resistant adhesive
- Measuring tape and marking pen
- Sharp utility knife or fabric scissors
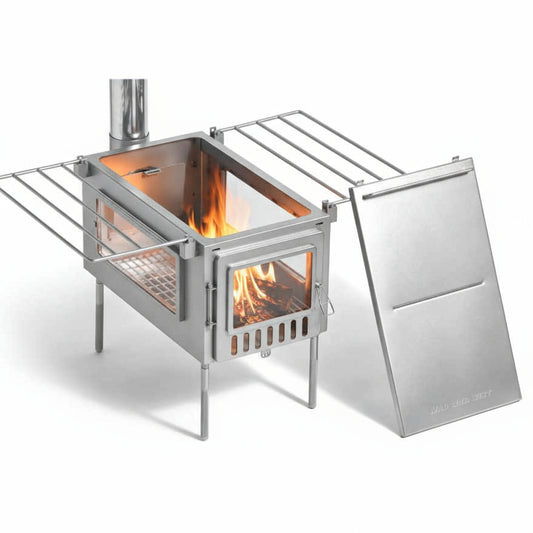
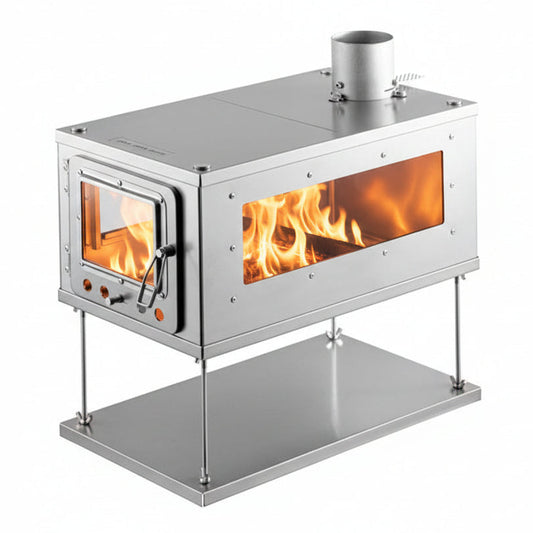
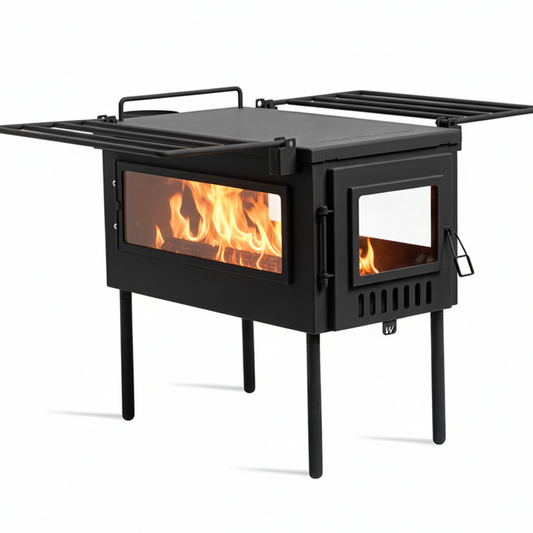
- A compatible tent wood stove
Step 1: Choose Your Stove Jack Location
Select a spot on the roof of your canopy that is centered and away from the frame. Ideally, position it in a place inside the tent which doesn't affect you entering or exiting the shelter. Mark the location clearly with a pen, ensuring the opening will accommodate your stove pipe diameter—typically 2 to 4 inches for most camping stoves.
Step 2: Cut the Stove Jack Opening
Carefully cut a hole through both the shelter fabric using a sharp utility knife. Follow the diameter specifications of your stove jack kit. Make clean, straight cuts to ensure a tight fit. If your kit includes a collar or flange, use it as a guide for the opening size.
Step 3: Install the Stove Jack
Most stove jack kits are designed to sandwich the fabric between an inner and outer ring. Secure the collar according to the manufacturer's instructions—this typically involves bolts, screws, or a combination of both. Ensure the seal is airtight to prevent water leakage and heat loss.
Step 4: Seal All Gaps
Apply high-temperature silicone sealant around the perimeter of the stove jack collar, both inside and outside the tent. This prevents drafts, water leakage, and heat loss. Pay special attention to any gaps between the collar and the fabric. Allow the sealant to cure completely before using the stove.
Step 5: Test for Safety
Before your first camping trip, conduct a thorough safety check. Set up the tent and run your stove at low heat for 15 to 20 minutes while monitoring the stove jack area for any signs of water leakage, excessive heat, or fabric damage. Ensure the stove pipe is properly secured and that there is adequate clearance between the pipe and any tent fabric or frame components.
Important Safety Considerations
Maintain at least 18 inches of clearance between the stove pipe and any flammable materials inside the tent. Never leave a stove unattended while it is operating. Ensure proper ventilation by cracking a window or door slightly to allow fresh air intake, which helps the stove draw efficiently and reduces carbon monoxide buildup. Install a carbon monoxide detector inside the tent as an additional safety measure.
Keep a fire extinguisher (or water) nearby and familiarize yourself with its use. Regularly inspect the stove jack seal and reinforcement patch for wear or damage, and replace them if necessary. Always follow the manufacturer's guidelines for your specific stove model.
Final Thoughts
Converting a pop-up canopy into a hot tent with a stove jack is a rewarding project that extends your camping season and increases comfort in harsh conditions. With careful planning, quality materials, and attention to safety, you can create a reliable shelter that performs well in bad weather environments. Whether you're hunting, ice fishing, or simply enjoying the backcountry in cold weather, your converted hot tent will provide the warmth and protection you need.