How-to Start Tent Wood Stove and Make It Burn Hot
Getting Your Tent Wood Stove Started: A Step-by-Step Guide
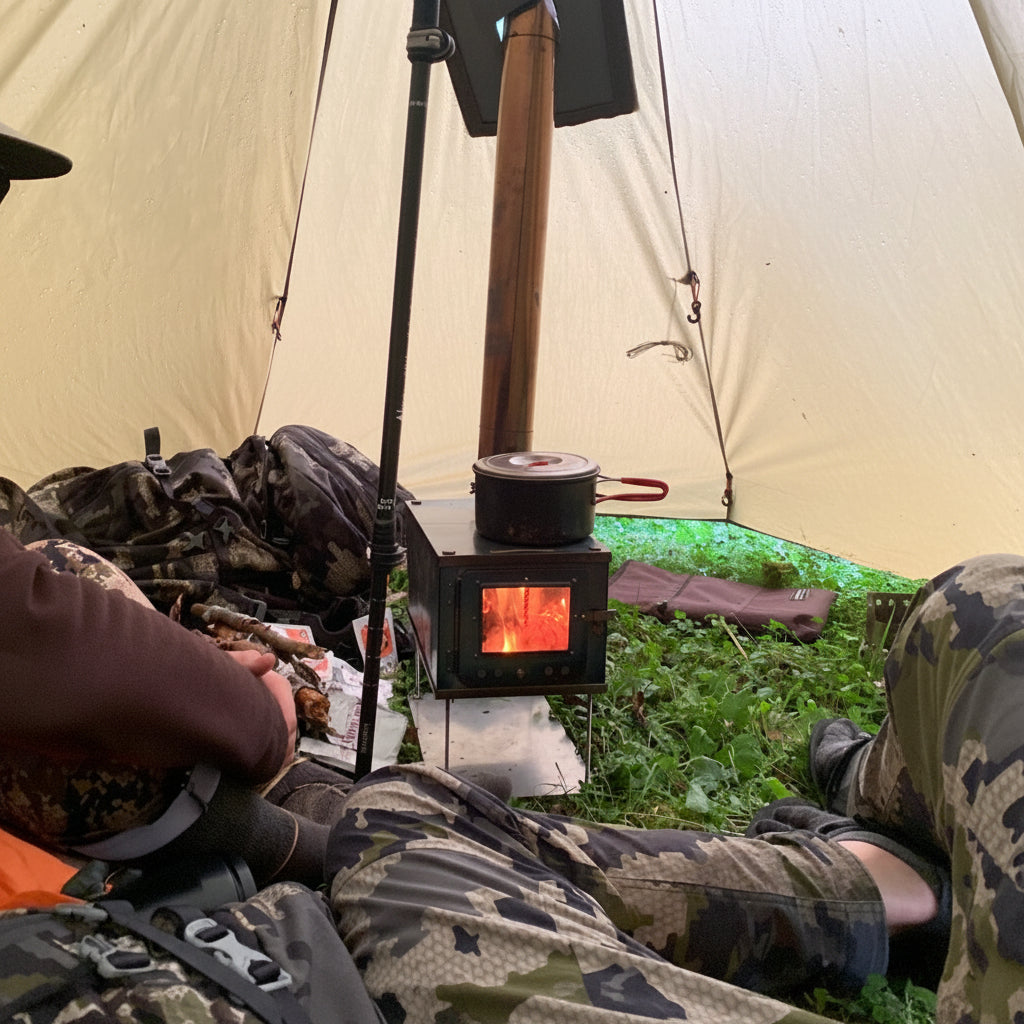
Lighting a tent wood stove properly is essential for safety, efficiency, and getting the most heat from your setup. Whether you're settling in for a cold night in the backcountry or establishing a base camp, mastering this skill will make your outdoor experience far more comfortable.

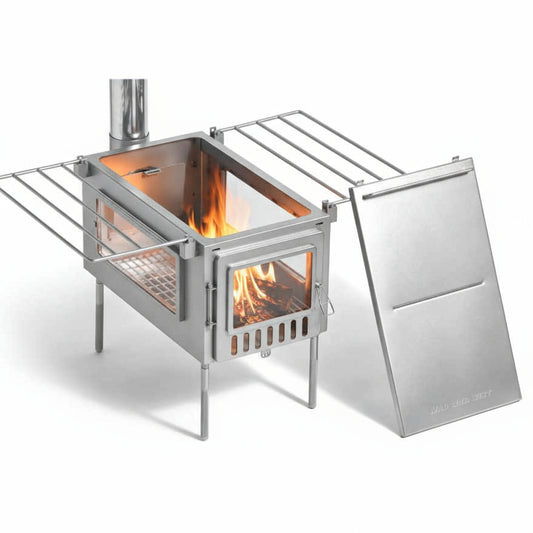
Prepare Your Materials Before You Start
Before attempting to light your stove, gather everything you'll need. Collect tinder—dry leaves, bark, small twigs, or commercial fire starters work well. Next, gather kindling in varying sizes, starting with pencil-thin pieces and working up to thumb-sized branches. Finally, have your larger fuel wood ready and split into manageable pieces. Keeping all materials within arm's reach prevents fumbling once you've started the fire.
Check that your stove's damper or air vents are fully open. This allows maximum airflow, which is critical for ignition and initial flame development. A closed damper will suffocate your fire before it has a chance to catch.
Build Your Fire Structure
Start by creating a small bundle of tinder in the center of your stove's firebox. Arrange your kindling in a loose teepee or log cabin structure around the tinder, leaving plenty of space for air to flow through. The key is creating a structure that allows oxygen to reach the flames while supporting the weight of larger pieces as they catch.
Avoid packing materials too tightly. A common mistake is creating a dense bundle that restricts airflow and smothers the developing flames. Think of it as building a structure with breathing room.
Light and Nurture the Flame
Light your tinder bundle using a lighter, matches, or ferro rod. Once the tinder catches, gently blow on the base of the flame to increase oxygen flow and encourage the kindling to ignite. This is a delicate balance—blow too hard and you'll scatter embers, but blow too softly and the fire won't develop the heat it needs.
Pro tip: You can close the wood stove door to create an air draw, if the stove you're using is designed well.
As the kindling begins to flame, gradually add slightly larger pieces. Add one piece at a time, allowing each to catch before introducing the next. Patience here pays dividends; rushing this stage often results in a smoldering fire that produces more smoke than heat.
Transition to Full Fuel
Once your kindling is burning steadily with visible flames, begin adding your larger fuel wood pieces. Place them horizontally across the fire, allowing air to circulate underneath. As the fire grows hotter, you can add thicker pieces and adjust your damper to control the burn rate.
Monitor the flame color and intensity. A healthy fire in a tent stove should produce bright orange and yellow flames with minimal smoke. If you see excessive smoke, your wood may be too wet, or your airflow may be restricted.
Safety Reminders
Always ensure your stove has adequate clearance from tent fabric and gear. Never leave a burning stove unattended, and always fully extinguish the fire before leaving camp. Keep water or snow nearby for emergencies, and ensure your tent has proper ventilation to prevent carbon monoxide buildup.
With practice, lighting your tent wood stove becomes second nature. The reward is a warm, reliable heat source that transforms your cold-weather camping experience.